Assyrian army

Assyrian army

Thursday, 31 October 2019

Garrison G3 Hoplite Review

I've been over all the G3 units now and updated them all.

216 G3 hoplites in total.

The front row are 'my' figures.

This is the lot I finished in January.

And the ones just finished.

This lot are from just before I bought Harry's collection and was experimenting with coloured filler for bases. At the time I intended to detail the bases but the huge influx of figures that needed rebasing from Harry made that idea non-viable. Bases were originally a dark earth colour so I've just repainted them. Note that this unit has been painted with individual iron scales. Takes time but usually looks good.

These four units are all ex-Harry - my intention was to have 48 strong hoplite units, getting 18 24 figure Greek units from Harry dented that thought!

Ex-Harry with Spartan shield design. No work needed.

This lot have been rebased.

This lot just needed a couple of figures reglued to the bases.

Nothing done with these - might do a couple more units with different shield designs later.

My original G3 unit, didn't do anything with it - probably really needs to be quietly retired - it dates back to 1970-72. Some of these I got from Pete Harris (author Tercio rules as used in several National Wargames Championships) - Greenwood & Ball suddenly changed to their new 25mm Greeks and we were part way through finishing units - so we swapped, I got Pete's G3s, he got my G2s.

Wednesday, 30 October 2019

Greek hoplite G3 unit completed...

Getting back into painting Ancients again after the drought...
I decided on bronze shields with white birds rather than painted with a mix of designs.

When I'm feeling patient I sometimes do the individual iron plates but again went for the easier option!

Meanwhile still haven't fully rebased all the ones I got from Harry, so prepping them for rebasing and will probably do a mini Greek Review of G3s when they're finished.

Meanwhile, David reminded me of the Indians I've still got to paint, so may do some of  them next.

Then again, realised I've still got 2 more armoured elephants that need looking at... do I completely repaint or go minimal effort?

Of course, there's also this battlefield still set up and waiting for me to do a 15mm WW2 French/German battle!

So, all in all got a lot of things planned over the next few days.


Tuesday, 29 October 2019

Interim Assyrians...

Finished painting the tin plate chariots but ran out of sand coloured filler for the base - so figures put to one side unassembled.

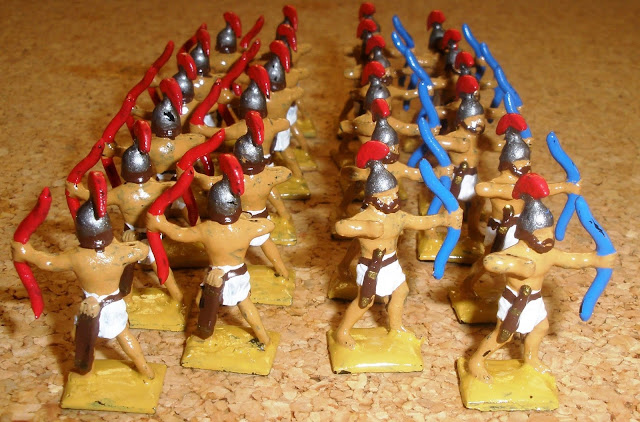
Meanwhile, I got on with filling a gap in my S Range Assyrians - light archers.

The figure itself is, I think, the one listed as a Carthaginian archer. Over the years I've picked up enough of these figures to make two 12 man units.

Continuing with getting back into painting I thought - it's been a while since I've painted any Greek hoplites and can't have too many G3s...

Monday, 21 October 2019

If you have a painting block...

... Paint elephants. Or chariots.

So, having started some Sherden, then more of the Langley figures, then some 42mm Russians, all stalled... looked at 4 of the elephants sitting on a shelf and decided 'Why not'.
Went for a slightly different look to the other 6 of these - 6 is enough for an army in most cases so by doing these a bit differently I can use them in two different armies and look as though it's intentional rather than just splitting a unit.

Original intention was to put shields on the side but in the event I didn't.
Comparison between the two sets. The bronze paint I used for the armour is different, the 'new' elephants have uncovered ears and the crews are in red.

So, it means I now have 10 painted 'S' Range armoured elephants with PB Mahout and 'S' Range Late Roman archer crew - every now and then I buy up some Late Romans and they always seem to come with archers so I've got quite a few. In howdahs you can't see their breeches and they fit in well so, why not?

Next, get started on finishing more of the the Assyrian chariots.

Thursday, 17 October 2019

A slight accident....

My wife Sandra collects (among other things) European 'candle houses' - usually bought at Birmingham Christmas Market. Anyway, couple of them had a slight accident... my fault, to do with laptop cables, extension cords and lines running behind the things on the mantelpiece... anyway, end result , two of them on the floor slightly, well, damaged...
How they looked.

Sort of fixed (never found where the left over pieces went)

Repairs on this one not deemed enough for it to go back on the shelf.

This one was considered to be good enough.

So, end result, one damaged building suitable for use on the wargames table. Must admit, would have preferred it to be the water mill.


Thursday, 10 October 2019

Spain v the Celts - double DBA-ish Part the Second

Second phase of the battle as in second session - so  I've also reset the tree counter!
Scene at the end of movement in Move 5.

Another river proved no obstacle for the Celts - both rivers threw a 1, could have made a difference on the other flank if it had proved uncrossable on a 6. Really, though, on this flank nothing much happened!

The Spanish forward hill is starting to get a bit surrounded by Celts...

While the other hill awaits the onslaught. The Spanish general and other cavalry are meanwhile fully occupied.

The battle for the Spanish left continues...

Move 6 sees the Spanish advanced hill looking a bit fragile as it's completely surrounded.

And... the onslaught starts on the other hill.

And... The Spanish left is a bit crumbly.

End of the move see dead warbands and auxilia all over the place. Mostly warbands.

The position is pretty even at this point - both sides have lost 7 elements. The Spanish are a mix of troop types, the Celts are all warband! Mainly due to frontally charging Auxilia on hills.

It isn't as even as the casualties imply though - the Spanish left flank is about to go under.

Meanwhile there is a clash of generals. The Spanish general is actually Carthaginian - ex-Harry bodyguard, and the fact they are on palominos suggest he painted them - think Harry likes palominos. Don't remember where I got the general from, could have been Harry.

Closer view of the Spanish left at the point of contact.

Closer view of the Spanish left after contact - LI pushed off the edge of the world and cavalry pushed back without being able to go anywhere.

Lots of infantry dying on a hill.

View from the Spanish right...

View from the Spanish left... At which point the Celts had lost 8 elements, the Spanish 12. More importantly, the Spanish position didn't seem to be viable so battle over.

An interesting battle. I tried to play it as a battle rather than a wargame - as a competition wargame I wouldn't have launched the warbands against the hill the way I did here and I would have held the Spanish left back rather than go for the river line. I would possibly have been a bit more aggressive with the Auxilia on the second hill. Might even re-run the battle doing that sometime. It was good finding out the way the terrain affected everything - good battle.


Wednesday, 9 October 2019

Spain v the Celts - double DBA-ish

That very uneven and hilly terrain setup just seemed to shout 'Spain'... so gives me a chance to use the Spanish component of my Minifigs PB Carthaginian army - though 3Ax are being fielded a 4Ax. As an opponent, thought a Celtic invasion would work - gives me a chance to use the Garrison Celtic infantry though they have yet to be rebased. Which is fine - treat them as if they are single based and they look better with the added depth anyway. The rules themselves, again doing things solo allows me to use and alter them as I like.


At the start of the battle the Spanish plan is to try and hold the high ground and river banks.

However the Celts easily crossed the river on their left flank... I'm doing my usual thing of using trees as move markers.

On the right, the Spanish lights reach the line of the other river before the Celts reach. In the centre, the Spanish are perched on two hills - with the disadvantage that there is a gap between the hills.

The fight on the Spanish left has started and the Spanish cavalry are facing the ends of the Celtic right centre. I used 15mm trees for this battle as they fit in with the terrain better size-wise.

The forward Spanish hill is about to get attacked to the front.

Those Spaniards holding level ground between the hill and the river don't fare well.

A view of the Spanish right flank show it under pressure - the Celts on the other bank are approaching the river as well.

Meanwhile on the Spanish extreme left the Celts are making headway.

The Spanish left and left-centre. The cavalry are doing well, the light infantry less so.

Right centre is a similar story - Spaniards on the hill killing off an assault while the Spaniards on the plain die bravely.

Spanish right flank the Celts are quickly approaching the river line as the Spanish try to cover any possible crossing.

Meanwhile the second Spanish line awaits the onslaught.

Spanish extreme left looking increasingly fragile.

A view of the battle at the end of Move 4 taken from the Spanish left flank.

And a similar view from the Spanish right.